TL;DR
The most effective way to reduce noise from a closet-based rig isn’t just acoustic foam — it’s about strategic placement, ventilation, and sealing. Moving the rig out of your main space or into a ventilated closet makes a huge difference in noise levels and sound quality.
Imagine turning a tiny closet into your secret recording haven — quiet, insulated, and perfectly sound-treated. It sounds simple, but the truth is, the secret isn’t just foam or blankets; it’s where you put your gear and how you treat that space. When you focus on placement and proper dampening, you can turn a noisy, echo-prone closet into a professional-sounding studio — without spending a fortune or losing your mind. You might find this guide on acoustic dampening and setup helpful.
This guide reveals the proven tricks for making your closet work for you. From moving your rig to choosing the right treatment, you’ll learn how to cut down noise, tame reflections, and keep your hardware cool. Whether you’re a streamer, voice-over artist, or just want a quiet corner for your AI work, these tips will make your setup sound better and stay cooler. For more on cooling strategies, check out this detailed guide.
Acoustic dampening
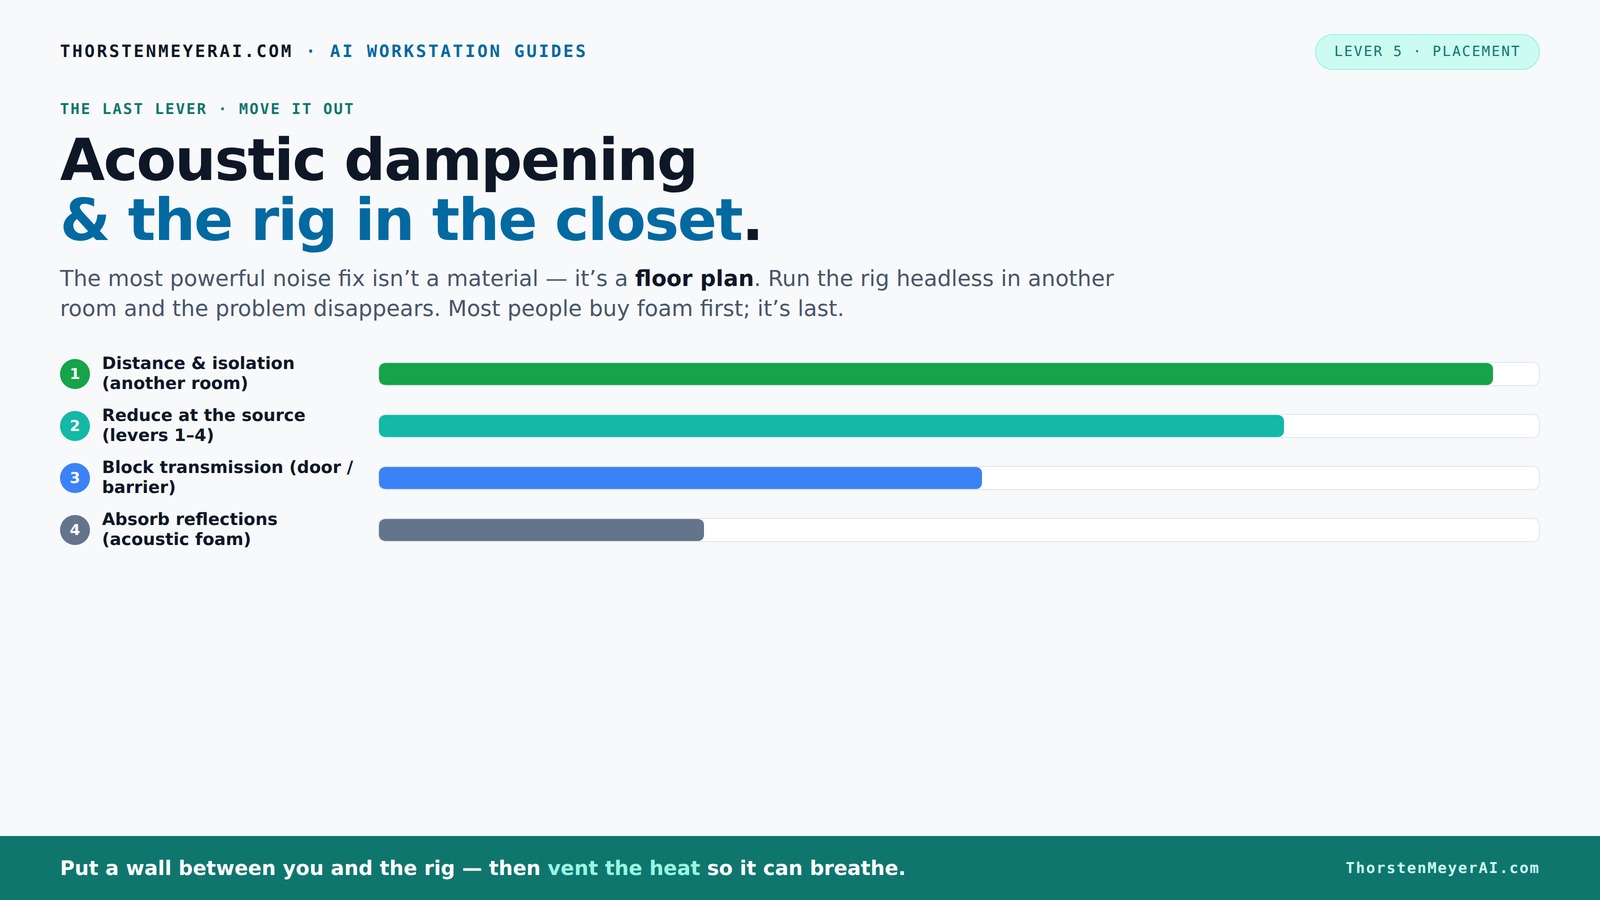
& the rig in the closet.
The most powerful noise fix isn’t a material — it’s a floor plan. A rig you can’t hear because it’s in another room beats any amount of foam. Tap the approaches in Part 1 to see what actually works.
(another room)
(levers 1–4)
(door / barrier)
(acoustic foam)
Contain the noise, not the heat
Key Takeaways
- Moving your rig into another room or closet drastically reduces noise transmission — it’s the biggest gain.
- Ensure proper ventilation in a sealed space to prevent heat damage and maintain hardware longevity.
- Strategically place acoustic panels at reflection points — behind the mic, ceiling, and opposite wall — for the best sound.
- Seal gaps around doors and walls with weatherstripping or blankets to block sound leaks.
- Treat the floor and ceiling with rugs and blankets to avoid echo and improve natural sound quality.

Focusound 52 Pack Acoustic Foam Panels 1" x 12" x 12" Sound Proof Foam Panles Soundproofing Noise Cancelling Wedge Panels for Home Office Recoding Studio with 300PCS Double-Side Adhesive
Soundproofing - Acoustic foam panels triangular grooves structure for better noise absorption, helps to reduce and absorb unwanted...
As an affiliate, we earn on qualifying purchases.
As an affiliate, we earn on qualifying purchases.
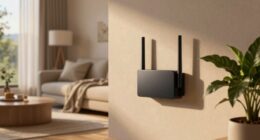
Why Moving Your Rig Is the Biggest Win for Noise Control
The simplest, most effective fix for a noisy rig? Put it somewhere else. Distance and isolation crush noise like nothing else. Think about it: a GPU tower in the next room, humming away, is almost silent compared to one sitting right on your desk. When you SSH into your AI workstation, it doesn't matter where it is — a closet or basement is perfect.
For example, I set my AI rig in a spare closet on a wired connection. The noise? Completely gone from my workspace. The key is having good ventilation and a decent network connection. This way, you get to keep your workspace quiet, cool, and clutter-free, while the heavy lifting happens elsewhere.
Remember: a well-placed rig in another room can cut noise by 80-90%, making the need for acoustic foam almost irrelevant. It’s about strategy, not just soundproofing.
Why does this matter? Because reducing the physical proximity of noisy hardware directly impacts the ambient noise level in your recording or working space. The closer the gear, the more noise it produces that can be picked up by microphones or cause distractions. Moving the rig also minimizes vibrations and mechanical noise that are difficult to dampen otherwise. The tradeoff is the need for reliable network and ventilation solutions, but the payoff in sound clarity and a quieter environment is well worth it.

Audimute Soundproofing Acoustic Door Seal Kit - Door Sweep and Seal - (Large Size)
Includes (2) Door Seals (3/16" x 1/2" x 50') and (1) Door Sweep (1/2" x 1.5" x 25').
As an affiliate, we earn on qualifying purchases.
As an affiliate, we earn on qualifying purchases.
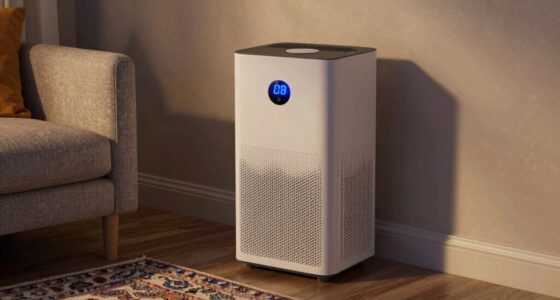
The 'Rig in the Closet' Setup — How Ventilation Keeps Your Hardware Happy
Placing a hot, high-load machine in a closet sounds perfect — until heat builds up. Without proper airflow, your rig’s temperature can soar, causing throttling and loud fans. The secret? Ventilation. Active airflow, like exhaust fans or ducted vents, keeps heat moving out. You can learn more about proper acoustic dampening and ventilation setup.
For instance, I installed a quiet exhaust fan in my closet to pull hot air out and draw in cool air through a passive vent. The result? My GPU runs at 65°C instead of 85°C, and the fans stay whisper-quiet. It’s a balancing act: seal the closet enough to dampen sound but provide enough airflow to keep things cool.
Why is this important? Because excessive heat can cause hardware to throttle performance, which not only impacts your work but also increases noise levels as fans spin faster to compensate. Proper ventilation prevents thermal stress, prolongs hardware lifespan, and maintains a stable environment for your recordings or processing tasks. The tradeoff involves installing additional ducting or fans, but neglecting cooling can lead to overheating and hardware failure, negating the benefits of a sealed, sound-treated space. For optimal results, consider purpose-built soundproof cabinets with integrated temperature controls, which combine acoustic treatment with cooling solutions to keep your gear reliable and quiet. Check out this detailed guide on cooling and ventilation.

Sound Addicted - Studio Monitor Isolation Pads suitable for 6.5, 7 and 8 Inches Large Speakers | Reduce Vibrations and Fits most Stands - Pair | SMPad 8
SMPad 8 is made out of the highest quality acoustical foam (50kg/m^3 density).
As an affiliate, we earn on qualifying purchases.
As an affiliate, we earn on qualifying purchases.
Acoustic Treatment vs. Soundproofing — What's the Difference and What You Need
Acoustic dampening and soundproofing are not the same. Acoustic foam and blankets soften reflections inside your closet — making recordings clearer and reducing echo. Soundproofing, on the other hand, blocks sound from leaking out or in. Think of it like insulation vs. curtains.
For example, thick foam panels reduce the 'boxy' sound in a tiny closet, but only sealing gaps around the door or walls keeps noise from escaping. Combining both gives you a quiet, natural-sounding space.
Understanding this distinction is crucial because each approach addresses different problems. Acoustic treatment improves the internal sound quality, making your recordings warmer and less echoey, which is essential for clarity and professional-sounding audio. Soundproofing, however, prevents external noises from bleeding into your recordings and keeps your sound contained. You can learn more about soundproofing versus acoustic dampening to choose the right approach. The tradeoff is that soundproofing often requires more effort, added mass, and sometimes more expensive materials, whereas acoustic dampening is more about finesse and placement. To achieve optimal results, a combination of both—strategically placed foam panels and sealing gaps—is often necessary, especially in small, enclosed spaces like closets. Without proper soundproofing, even the best internal treatments won't prevent noise from leaking out, which can be problematic if you record in shared spaces or need privacy.
ventilated closet acoustic treatment
As an affiliate, we earn on qualifying purchases.
As an affiliate, we earn on qualifying purchases.
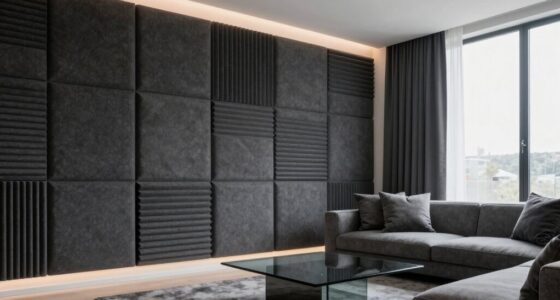
Where to Place Absorbers and Panels for Maximum Effect
Placement matters more than the number of panels. Focus on the main reflection points: behind the mic, the ceiling, and the wall opposite your source. For tips on optimal placement, see this guide on acoustic panel placement. In a closet, the mirror-like surfaces of the walls cause echo and muffling. Covering these areas with foam or blankets improves clarity.
For example, I added foam panels directly behind my mic and on the ceiling. This cut down on the 'tinny' sound and made my recordings warmer and clearer. Use a mirror trick: have a friend hold a mirror on the wall while you record — spots where your reflection bounces sound are your target for treatment.
Why does this placement matter? Because sound waves bounce off reflective surfaces, creating echoes, muddiness, or a thin sound. Addressing these key reflection points ensures that your voice and instruments are captured cleanly and naturally. The tradeoff involves balancing coverage with ease of installation; over-treating can deaden your space excessively, making recordings sound unnatural. Strategically placed panels allow you to optimize sound quality without sacrificing room liveliness. Proper placement also helps prevent sound from bouncing into unwanted areas, reducing phase issues and improving clarity. In small spaces, targeted treatment at reflection points yields the best results for natural, professional sound.
Treating the Closet Door and Walls — Seal the Weak Points
The door is often the weakest link in a closet setup. Gaps around the frame let sound leak and reflections bounce back. Seal with weatherstripping, acoustic sealant, or add blankets or foam around the edges.
For instance, I used weatherstripping around my closet door and added a foam panel with velcro to cover the gap. It made a noticeable difference, reducing sound escape and keeping reflections contained.
Why is sealing important? Because sound can find its way through even tiny gaps, undermining your entire acoustic treatment. Unsealed gaps act like open windows, allowing noise to escape and external sounds to intrude, which compromises your quiet environment. Proper sealing ensures that your acoustic efforts are effective and that your recordings remain clean and isolated. Additionally, sealing gaps prevents sound from bouncing back into your space, which can cause unwanted reflections and muddiness. The tradeoff involves some effort and cost—weatherstripping, sealants, or blankets—but the payoff is a significant increase in sound isolation and clarity. For best results, inspect all potential leak points and seal them thoroughly, including around the door frame, electrical outlets, and any vents or gaps in the walls.
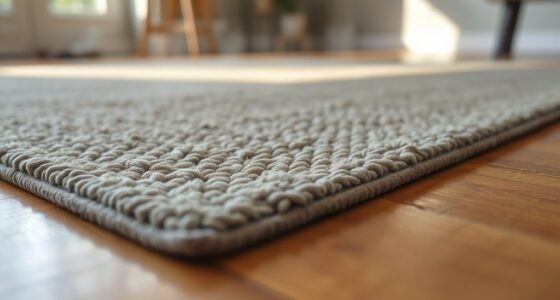
Floor and Ceiling — Often Overlooked but Critical
Reflections from the floor and ceiling can make your closet sound 'boxy' or hollow. Adding a rug or foam on the floor reduces bouncing sound waves. Ceiling treatment, like hanging acoustic blankets or panels, softens reflections from above.
For example, I placed a thick rug on the floor and hung a blanket from the ceiling with curtain hooks. The result? A much warmer, more natural sound with less echo and 'ring.'
Why does this matter? Because in small, enclosed spaces, every surface reflects sound, creating a unnatural, echoey environment. Covering the floor with soft materials like rugs absorbs some of these reflections, preventing sound waves from bouncing repeatedly and causing muddiness. Similarly, ceiling treatments help diffuse sound from above, reducing flutter echoes and ringing. The tradeoff involves balancing sound absorption with room liveliness; over-treating can make the space sound dead or unnatural. Properly treating the floor and ceiling enhances the overall sound quality, making recordings clearer, more natural, and more pleasant to listen to. In small spaces, paying attention to these often-overlooked surfaces turns a hollow, echo-prone room into a cozy, controlled environment suitable for professional work.
Bass Traps and Low-End Control — Do You Need Them in a Closet?
Bass buildup happens in small, enclosed spaces with parallel walls. If your recordings sound boomy or 'muddy,' bass traps in corners can help. They absorb low frequencies that standard panels miss.
For example, I added small bass traps in the upper corners of my closet, which cleared up the muddy lows and made vocals sound more balanced. In tiny spaces, even a few bass traps can make a big difference.
Why are bass traps important? Because low frequencies tend to accumulate in corners due to standing waves, causing a boomy or muffled sound that standard absorption panels can't fully address. Without treatment, these low-end issues can mask clarity and make your recordings sound unprofessional. Proper placement of bass traps—ideally in the upper corners—is crucial since this is where standing waves tend to form most strongly. DIY options with mineral wool or rockwool panels are effective and cost-efficient. The tradeoff is that bass trapping requires more space and careful placement, but the payoff is a much tighter, balanced sound. If your recordings are boomy or you notice uneven frequency response, investing in bass traps will significantly improve the quality, ensuring your audio is clear across all ranges.
Frequently Asked Questions
Is acoustic foam enough, or do I need soundproofing too?
Acoustic foam mainly reduces reflections and echo inside your space but doesn't block sound from leaking out. For true noise isolation, you need soundproofing techniques like sealing gaps, adding mass, or using soundproof doors. Combining both gives the best results.
Where should I place acoustic panels in a closet studio?
Place panels at reflection points: behind the mic, on the ceiling, and opposite the sound source. Use a mirror trick to find where sound bounces; treat those spots for maximum effect. Covering the door gaps and sealing edges is also critical.
Do bass traps help in a closet, and where should they go?
Yes, bass traps are useful in small, enclosed spaces to tame low-frequency buildup. Place them in the upper corners of the closet, where standing waves tend to form. Even DIY traps with mineral wool work well if positioned correctly.
How do I stop sound from leaking through the closet door?
Seal gaps around the door frame with weatherstripping or acoustic sealant. Adding blankets, foam panels, or even a heavy curtain can significantly reduce sound escape. A well-sealed door is key to good isolation.
Should I treat the ceiling and floor, or just the walls?
Treat all reflective surfaces — walls, ceiling, and floor — to avoid echo and boxiness. Use rugs on the floor and hang acoustic blankets or panels from the ceiling for a balanced, natural sound.
Conclusion
Turning your closet into a quiet, high-quality recording space is all about smart placement and targeted treatment. Moving the rig out of your main workspace and carefully sealing and acoustic-treating your closet makes a world of difference. Remember, the goal isn’t just silence — it’s clear, natural sound in a space that stays cool and quiet.
Next time you think about noise, stop and ask: Where can I put this rig to keep the sound away from me? Sometimes, the best fix is simply distance and a little strategic treatment. Your future self will thank you for it — and your recordings will sound better than ever.