To fix minor tears and snags in your rug, start by inspecting the damage carefully from the backside to keep repairs discreet. Trim any loose fibers and use a gentle adhesive or specialized rug glue to secure frays and small tears, or sew patches from the back if needed. Reinforcing the area with matching fabric can prevent further damage. For more tips on seamless repairs, keep exploring how to restore your rug’s appearance effectively.
Key Takeaways
- Inspect the rug carefully to locate and assess small tears, snags, or frays, focusing on less visible areas like the backside.
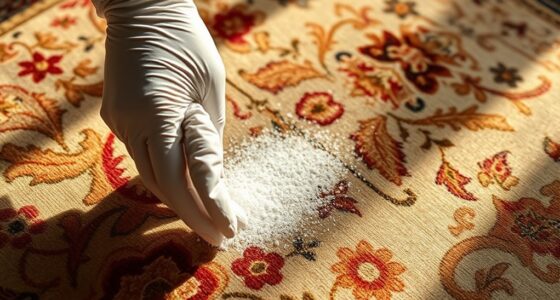
- Trim loose fibers and apply clear, specialized rug glue to secure frayed edges or small tears.
- Reinforce tears by attaching patches of similar fabric or backing material from the backside with glue or sewing.
- Use matching fibers or dye to seamlessly blend repairs and ensure a discreet, durable fix.
- Allow repairs to dry completely and gently clean the area to restore the rug’s appearance and longevity.
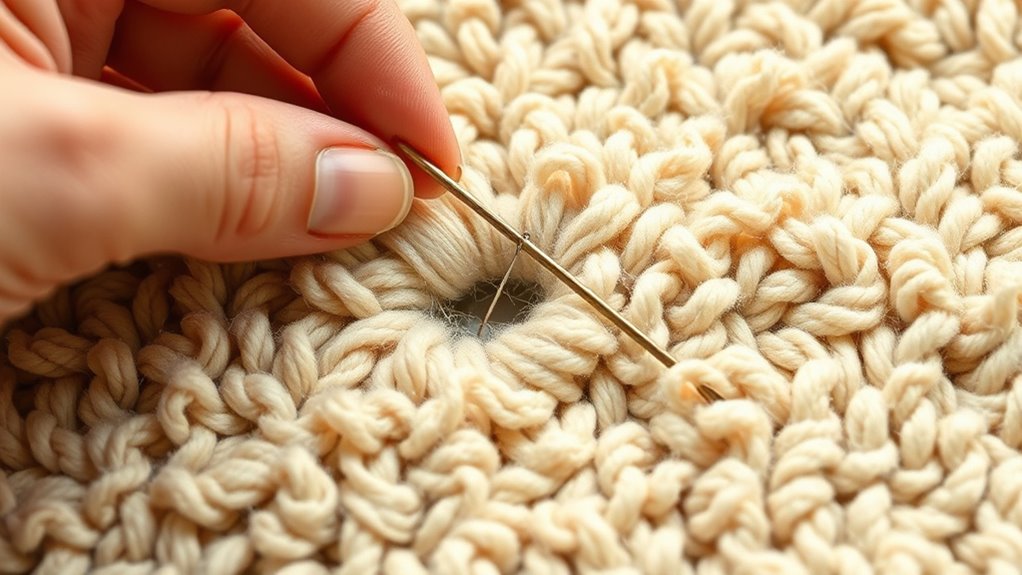
Over time, rugs can develop tears, frays, or holes, but you don’t need to replace them entirely. Minor damages are often fixable with some simple DIY techniques, saving you money and extending the life of your rug. The first step is to assess the damage carefully. If you notice a small tear or snag, you can often repair it from the backside, where it’s less visible. To strengthen the repair, fiber reinforcement is essential. You can use a piece of similar fabric or rug backing material to reinforce the area. Cut a patch slightly larger than the tear, and carefully glue or sew it behind the damaged spot. This helps prevent the tear from spreading further and adds durability. When choosing repair materials, consider using vetted supplies like specialized rug glue or matching fibers for seamless results.
When repairing frays or unraveling edges, start by trimming loose fibers close to the damage. Then, use a clear-drying adhesive or a specialized rug glue to secure frayed fibers back in place. For more extensive tears, sewing is a reliable option. Use a needle and strong thread that matches your rug’s fiber, and sew along the tear with small, tight stitches. This keeps the repair discreet and sturdy. If the tear is in a high-traffic area, consider adding a second layer of reinforcement with a patch, then sewing or gluing it into place.
Stain removal techniques are also vital in maintaining your rug’s appearance after repairs. Before fixing tears or snags, treat stains promptly to prevent discoloration. For common stains like coffee or wine, blot the area with a clean cloth and apply a mixture of mild dish soap and water. For tougher stains, you might need a specialized stain remover suitable for your rug’s fiber type. Always test stain removal techniques on a small, hidden section first to avoid damage or color fading. After cleaning, ensure the area is thoroughly dry before proceeding with any repairs to prevent mold or mildew.
In some cases, repair adhesives or fibers can be visible if not applied carefully. To blend repairs seamlessly, consider using a matching fiber or dye to touch up the repaired area. This step can make the fix almost invisible and restore your rug’s original look. Remember, patience is key—take your time with each step, and don’t rush the process. With the right tools, some basic skills, and a little effort, you can repair minor tears and snags yourself, preserving your rug’s beauty and functionality for years to come.

Cleaniago 14 Inch High Solid Bamboo Wood King Size Bed Frame with Headboard, Heavy Duty Metal Slat Support, No Box Spring Needed, Easy Assembly
Mid-Century Modern Elegance: This sleek bamboo king bed frame with headboard combines mid-century modern style with eco-friendly durability....
As an affiliate, we earn on qualifying purchases.
Frequently Asked Questions
Can I Repair a Large Tear Myself Without Professional Help?
You can repair a large tear yourself if you’re comfortable with basic tools and patience, but keep in mind that professional repair costs might be worth it for seamless results. For area rug maintenance, DIY fixes work best on minor damage, while larger tears may require expert help to guarantee durability. If you decide to proceed, carefully follow repair tutorials and use quality materials to save money and achieve a better outcome.
What Tools Are Essential for DIY Rug Repair?
You’ll need a few essential tools for DIY rug repair. Grab fabric glue to bond torn edges securely and a seam ripper to carefully remove damaged fibers or stitches. A sharp pair of scissors helps trim frayed edges, while a needle and matching thread are useful for sewing small tears. Having these tools on hand makes fixing minor tears and snags easier, ensuring your rug looks good as new.
How Long Does It Take to Fix a Snag or Tear?
Repairing a snag or tear usually takes about 30 minutes to an hour, depending on its size and your experience. The timing estimates can vary, but with the right tools and patience, you can complete the repair efficiently. You’ll want to carefully assess the damage first, then follow the steps methodically to guarantee a durable fix. Rushing might affect the repair duration and quality, so take your time for the best results.
Are There Specific Types of Rugs That Can’T Be Repaired DIY?
Some rugs, especially those made with delicate materials or synthetic fibers, aren’t suitable for DIY repairs. Think of it like trying to fix a fragile glass ornament—you might do more harm than good. If your rug is very old, heavily frayed, or uses intricate weaving, professional repair is best. You risk damaging the fibers or making the tear worse, so know your limits before attempting a fix yourself.
How Can I Prevent Future Tears or Snags on My Rug?
To prevent future tears or snags on your rug, focus on regular rug maintenance and preventing wear. Use furniture pads to avoid pressure points and rotate your rug periodically to ensure even wear. Keep high-traffic areas clean and free of debris, and avoid dragging heavy objects across the surface. These steps help safeguard your rug’s fibers, extending its lifespan and keeping it looking fresh longer.
Softa Mikor King Japanese Joinery Bed Frame with Headboard, Solid Rubberwood, 1500 Lbs Heavy Duty Slats Support, SGS Certified, 15Min No-Tool Setup, Hidden Storage, USB-A/C Port, No Box Spring Needed
【Japanese Joinery – 15-Min Tool-Free Assembly】– Built with traditional Japanese joinery, this bed frame requires no tools, no...
As an affiliate, we earn on qualifying purchases.
Conclusion
Now that you’ve mastered fixing those tiny tears and snags, you’ll never need to hire a professional—because who wouldn’t want to spend their weekend wielding a needle and thread? Ironically, a little patience and some simple tricks make rug repair almost fun. So go ahead, embrace your inner DIY hero. Soon, your damaged rug will look so good, no one will believe you didn’t hire a pro—proof that even minor mishaps can be turned into a proud masterpiece.

Softa King Solid Wood Bed Frame with Headboard, 1100 Lbs Heavy Duty Rubberwood Platform Bed, 15-Min Tool-Free Assembly, Quiet Stable Support, Japanese Japandi Design, No Box Spring Needed
【100% Solid Rubberwood, Built to Last】– Heavy-Duty Support Up to 1100 Lbs – Crafted from 100% solid rubberwood,...
As an affiliate, we earn on qualifying purchases.

Merax King Size Bamboo Platform Bed, Mid-Century Modern Bed Frame with Tall Headboard, Solid Sustainable Bedframe King-Size, Wood Slat Support, No Box Spring Needed, Easy Assembly, Noise Free, Brown
New Upgrade: The wooden support rods & legs in the middle of the bed have been replaced with...
As an affiliate, we earn on qualifying purchases.