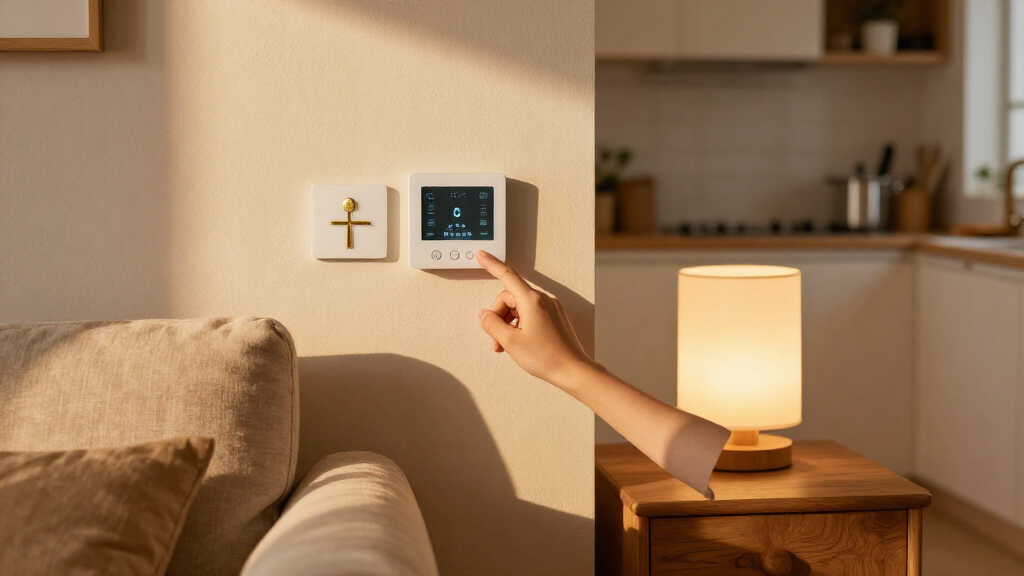

Set up smart home devices so they respond to a schedule, sensor, or voice command. This guide is for beginners who want to connect a few devices and build one reliable automation, such as turning on a lamp at sunset. Allow 45–90 minutes, depending on your devices and home network.

Get furniture and decor delivered free with Prime
- Fast, free delivery on millions of items
- Prime Video, Amazon Music and more included
- Member-only deals all year

Amazon Echo Hub 8-inch Smart Home Control Panel
- ✔ Display: 8-inch touchscreen, 1280 x 800
- ✔ Connectivity: Dual-band Wi-Fi, Bluetooth, Zigbee, Thread, Matter, Amazon Sidewalk
- ✔ Audio: Two top-ported full-range speakers with stereo playback
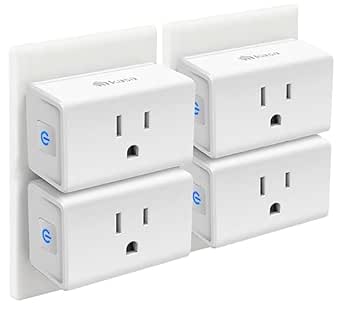
Kasa Smart Plug Mini EP10P4, 15A, 4-Pack
- ✔ Model: EP10P4
- ✔ Pack size: 4 plugs
- ✔ Maximum current: 15 A

Kasa Smart Plug HS103P4, 4-Pack, Wi-Fi Outlet
- ✔ Model: HS103P4
- ✔ Pack size: 4 plugs
- ✔ Operating voltage: 120 V AC
Difficulty: Beginner | Time: 45–90 minutes
What You’ll Need
Tools & Materials:
- Smartphone or tablet with the manufacturer’s app installed
- Wi-Fi router and its network name and password
- Smart home devices, such as a smart bulb, plug, or sensor
- Smart home platform or hub if required by your devices
- Optional: a ladder for safely reaching a light fixture
Knowledge:
- Basic use of a smartphone
- Ability to connect a device to your home Wi-Fi
Check each device’s supported Wi-Fi band, platform, and hub requirements before buying or starting setup. Many devices use 2.4 GHz Wi-Fi; some routers combine 2.4 GHz and 5 GHz under one network name. Keep your phone connected to the home network during pairing and have device account passwords ready.
Amazon Echo Hub 8-inch Smart Home Control Panel
The Echo Hub is the most capable automation foundation in this group because it is designed to manage more than the devices plugged into one outlet. Its 8-inch touchscreen dashboard can bring compatible devices, cameras, routines, security systems, and media into a single place, while built-in Zigbee, Thread, and Matter support gives it broader reach than either Wi-Fi-only Kasa plug. For a home with several device types, that combination can make everyday control more visible and centralized.That breadth comes with a different setup commitment. The Hub needs a dedicated location and an internet connection for setup; it is not a portable screen to carry around. Wall mounting hardware and a power adapter are included, but a tabletop stand, cable pass-through, and PoE converter are separate accessories. Buyers who only want to automate a lamp or fan can get started more simply with either Kasa four-pack. We would choose the Echo Hub when coordinating a compatible smart home matters more than minimizing hardware.Privacy controls, including a mic-off button, are useful additions for a control panel with speakers. Its ambient light and proximity sensors can help the screen respond to its surroundings, while the resizable dashboard lets households prioritize frequently used controls. Still, compatibility depends on the devices and services in a buyer’s setup; support for multiple standards does not mean every device will work. This is the clear overall pick for breadth, but it is also the most specialized device here.
Pros:
- Touchscreen dashboard organizes compatible device controls and routines.
- Built-in support for Wi-Fi, Bluetooth, Zigbee, Thread, and Matter.
- Wall mount and power adapter are included.
- Mic-off button and additional privacy controls.
Cons:
- Internet access is required for setup.
- Not designed for handheld or portable use.
- Tabletop stand, cable pass-through, and compatible PoE converter are separate.
Best for: Households building a compatible multi-device setup that want a fixed touchscreen for routines, cameras, and smart home controls.
Not ideal for: Buyers who only need remote control or schedules for a few plug-in appliances, or anyone who needs a portable controller.
Bottom line: We recommend the Echo Hub when our goal is to coordinate a wider compatible smart home from one fixed control point.
“We recommend the Echo Hub when our goal is to coordinate a wider compatible smart home from one fixed control point.”
Kasa Smart Plug Mini EP10P4, 15A, 4-Pack
For straightforward automation without a wall-mounted controller, the EP10P4 four-pack is the most flexible plug option in this lineup. Its compact design leaves the second outlet available on a standard wall socket, a small detail that can make a real difference when a lamp or small appliance shares a busy outlet. Schedules, timers, and Away Mode let us automate common routines, and the plugs work through the Kasa or Tapo app and compatible voice assistants.Compared with the HS103P4, the Mini adds a stated 15 A maximum current and Away Mode, as well as the more explicit compact-outlet advantage. Both sets control appliances over 2.4 GHz Wi-Fi and work without a hub, so neither can provide the broader device coordination or touchscreen overview of the Echo Hub. They are better understood as practical endpoints: useful for a lamp, fan, or other suitable appliance, but not a way to manage every smart device in a home.Setup and app control require Kasa or Tapo, and the 2.4 GHz network requirement may be a constraint in some homes. The stated 1800 W maximum is not a reason to connect any appliance indiscriminately; buyers should check that the intended device is appropriate for a smart plug and its electrical limits. This is our compact pick when outlet space and the extra Away Mode feature matter. If those details are not priorities, the HS103P4 covers the basic scheduling job too.
Pros:
- Compact form leaves the adjacent outlet available on a standard socket.
- Includes schedules, timers, and Away Mode.
- Works with Kasa and Tapo apps and compatible voice assistants.
- No separate hub is required; UL certified.
Cons:
- Requires a 2.4 GHz Wi-Fi connection.
- Kasa or Tapo app is required for setup and app control.
- Controls connected appliances rather than coordinating a wider smart home.
Best for: Buyers automating several suitable plug-in devices who need compact plugs that keep neighboring outlets accessible.
Not ideal for: People seeking a central screen, broader smart home radio support, or plug control without a compatible app and 2.4 GHz Wi-Fi.
Bottom line: We would pick the EP10P4 when compact placement and Away Mode make a four-plug starter set more useful.
“We would pick the EP10P4 when compact placement and Away Mode make a four-plug starter set more useful.”
Kasa Smart Plug HS103P4, 4-Pack, Wi-Fi Outlet
The HS103P4 is the uncomplicated choice for turning ordinary plug-in appliances into remotely controlled devices. Its four plugs connect to 2.4 GHz Wi-Fi without a hub, and the Kasa app offers remote control, schedules, and countdown timers. Alexa and Google Assistant support adds voice control, so a buyer can start with a few lamps or fans without first installing a central smart home panel.Against the EP10P4 Mini, this set provides the same core pattern of app, voice, and scheduled control, but the supplied description does not call out the Mini’s compact design or Away Mode. The EP10P4 also specifies a 15 A maximum current, while this listing states an 1800 W wattage limit without a current figure. That makes the Mini the easier comparison for buyers who care about outlet clearance or want the stated current rating. The HS103P4 still makes sense when basic schedules and remote switching are enough.It cannot replace the Echo Hub as a central control surface, and its 2.4 GHz network requirement is important to check before setup. App compatibility also lists minimum Android and iOS versions, so buyers should confirm their phone can run it. Four plugs make this a practical appliance-by-appliance starting point, but buyers should keep the stated electrical limit and the connected appliance’s suitability in mind. We see it as the plainest option here: less expansive than the Hub and less differentiated than the Mini, yet directly useful for basic automation.
Pros:
- Four plugs provide several appliance control points in one set.
- Remote operation, schedules, countdown timers, and voice control.
- Works with Alexa and Google Assistant.
- No separate hub required; UL certified with a two-year warranty.
Cons:
- Requires a 2.4 GHz Wi-Fi connection.
- Kasa app and compatible Android or iOS version are needed.
- Does not provide the Mini’s stated 15 A current rating or Away Mode.
Best for: People who want several everyday lamps or suitable appliances controlled remotely or on schedules without buying a separate hub.
Not ideal for: Buyers who need a touchscreen hub, compact outlet clearance, Away Mode, or a specifically stated 15 A current rating.
Bottom line: We recommend the HS103P4 for basic, hub-free appliance schedules when compactness and Away Mode are not deciding factors.
“We recommend the HS103P4 for basic, hub-free appliance schedules when compactness and Away Mode are not deciding factors.”
As an Amazon Associate we earn from qualifying purchases.
Before You Start
Choose one simple outcome for your first automation, such as switching on a plug at a set time. Put devices near the router for initial setup, and keep their reset and pairing instructions nearby. Do not install or modify mains wiring unless you are qualified to do so; use a plug-in device or contact an electrician instead. Review what information the device collects and who can access the account.
Step-by-Step Instructions
Step 1: Choose a control platform
Select the manufacturer’s app, a compatible smart home platform, or the hub specified by the device. Check the device packaging or product listing for supported platforms, and install the required app from your phone’s official app store. Create or sign in to the account you will use to manage the devices.
Tip:Devices that use different standards or platforms may not work together. Confirm compatibility before adding more devices.
Check: The app opens and shows the device setup or add-device option.
Step 2: Prepare the network and device
Connect your phone to your home Wi-Fi, then plug in or power on the device according to its instructions. Keep it close to the router during pairing. If the manufacturer requires a hub, power on the hub and connect it to the router before adding other devices.
Tip:Do not use a guest network if it blocks communication between devices. Avoid changing router security settings unless the manufacturer’s instructions require it.
Check: The device is powered on, and any required hub appears as connected in its app.
Step 3: Add the device in its app
Open the app, choose its add-device option, and select the correct device type or scan its setup code when prompted. Follow the pairing prompts, grant only the permissions needed for setup, and enter your Wi-Fi password if requested. Wait for the app to confirm the device has joined the network.
Tip:Pairing mode often ends after a short period. If the app cannot find the device, restart pairing using the manufacturer’s instructions rather than repeatedly entering different passwords.
Check: The device appears in the app with an online or connected status, and you can control it from the app.
Step 4: Name and organize the device
Give the device a short, specific name such as “Living room lamp,” then assign it to the correct room in the app. Use a name that is easy to recognize in voice commands if you plan to use them. Add other devices one at a time and give each a distinct name.
Tip:Avoid similar names for devices in the same room; voice assistants can confuse them.
Check: The device appears under the right room and responds when you select it by name.
Step 5: Create a basic automation
Open the app’s automation, routine, or scene section and choose to create one. Set a clear trigger, such as a time or sunset, then choose the action and target device, such as switching on the living room lamp. Set any required days, location, or sunset offset, save the automation, and enable it.
Tip:Location-based triggers may need location permission and a correctly set home address. A schedule is a simpler first test if you do not want to share location.
Check: The saved automation is listed as enabled and shows the trigger and action you selected.
Step 6: Test the device and automation
Use the app to switch the device on and off manually. Then test the automation by choosing a near-future time or using the app’s test option, if available. Check that the device performs the intended action, then change the trigger to your preferred schedule.
Tip:Allow for a short delay when a hub or cloud service is involved. Check the app’s activity history if the automation does not run.
Check: The manual control works, and the automation runs the intended action at its trigger.
Step 7: Review access and settings
Check the app’s account and sharing settings. Remove test automations you no longer need, invite only trusted household members, and enable available account protections such as two-step verification. Install device or app updates when the manufacturer offers them.
Tip:Keep the account recovery method current so you can regain access if you change phones.
Check: Only intended users have access, and the device remains online after setup.
Common Mistakes to Avoid
- Buying a device that does not work with the chosen platform or hub. — Check supported platforms, Wi-Fi bands, and hub requirements before purchase.
- Trying to pair the device while the phone is on the wrong network. — Connect the phone to the home network and check whether the device requires 2.4 GHz Wi-Fi.
- Creating an automation with an unclear name or wrong trigger. — Use distinct device names and review the trigger, days, and action before saving.
Troubleshooting
Problem: The app cannot find the device during pairing.
Solution: Move the device closer to the router, confirm it is powered, and restart pairing using the manufacturer’s reset or pairing instructions. Check that Bluetooth or local network access is enabled if the app requests it.
Problem: The device connects but shows offline later.
Solution: Check the router connection and signal where the device is installed. Restart the device and router if needed, then check the manufacturer’s app for a service or firmware issue.
Problem: The automation is enabled but does not run.
Solution: Confirm its schedule, time zone, days, and target device. For sunset or location triggers, verify the home address and required app permissions. Review activity history for a failure message.
What Success Looks Like
Your device appears online in its app, has a clear room and name, and responds to manual control. The saved automation is enabled and performs the specified action when its trigger occurs. Check the app’s status or history if you need to confirm a run.
Next Steps
Add devices gradually and test each one before including it in a larger routine. Review automations after changing your Wi-Fi, phone, schedule, or home address. Remove devices you no longer use from the app, and consult the manufacturer or a qualified electrician if setup involves wiring or repeated connection failures.
Frequently Asked Questions
Do smart home devices need an internet connection?
Many devices need internet access for remote control, voice assistants, or cloud-based automations. Some hubs can run selected automations locally when the internet is unavailable; check the device and platform documentation.
Can devices from different brands work together?
Sometimes. Check that each device supports the same platform or hub, and confirm any required standard or feature. Sharing a Wi-Fi network alone does not make devices compatible.
Why does a device need 2.4 GHz Wi-Fi?
Some smart devices support only the 2.4 GHz band, which many routers provide alongside 5 GHz. Check the device instructions and router settings; do not assume every device supports both bands.
Can I control my devices when I am away from home?
Remote control usually requires the device or hub to be online and the app account to support remote access. Test access while away only after setup, and protect the account with a strong, unique password.